This blog is a celebration of the wonderful world of vegan cooking. Enjoy!

* The title of this blog refutes the dangerous idea that veganism is a weight-loss diet and that all vegans are skinny. Conversely, being a-not-so-skinny-vegan is also not the same as being overweight or unhealthy. All food intake must be part of a balanced lifestyle.
Showing posts with label main. Show all posts

Thursday, August 8, 2013

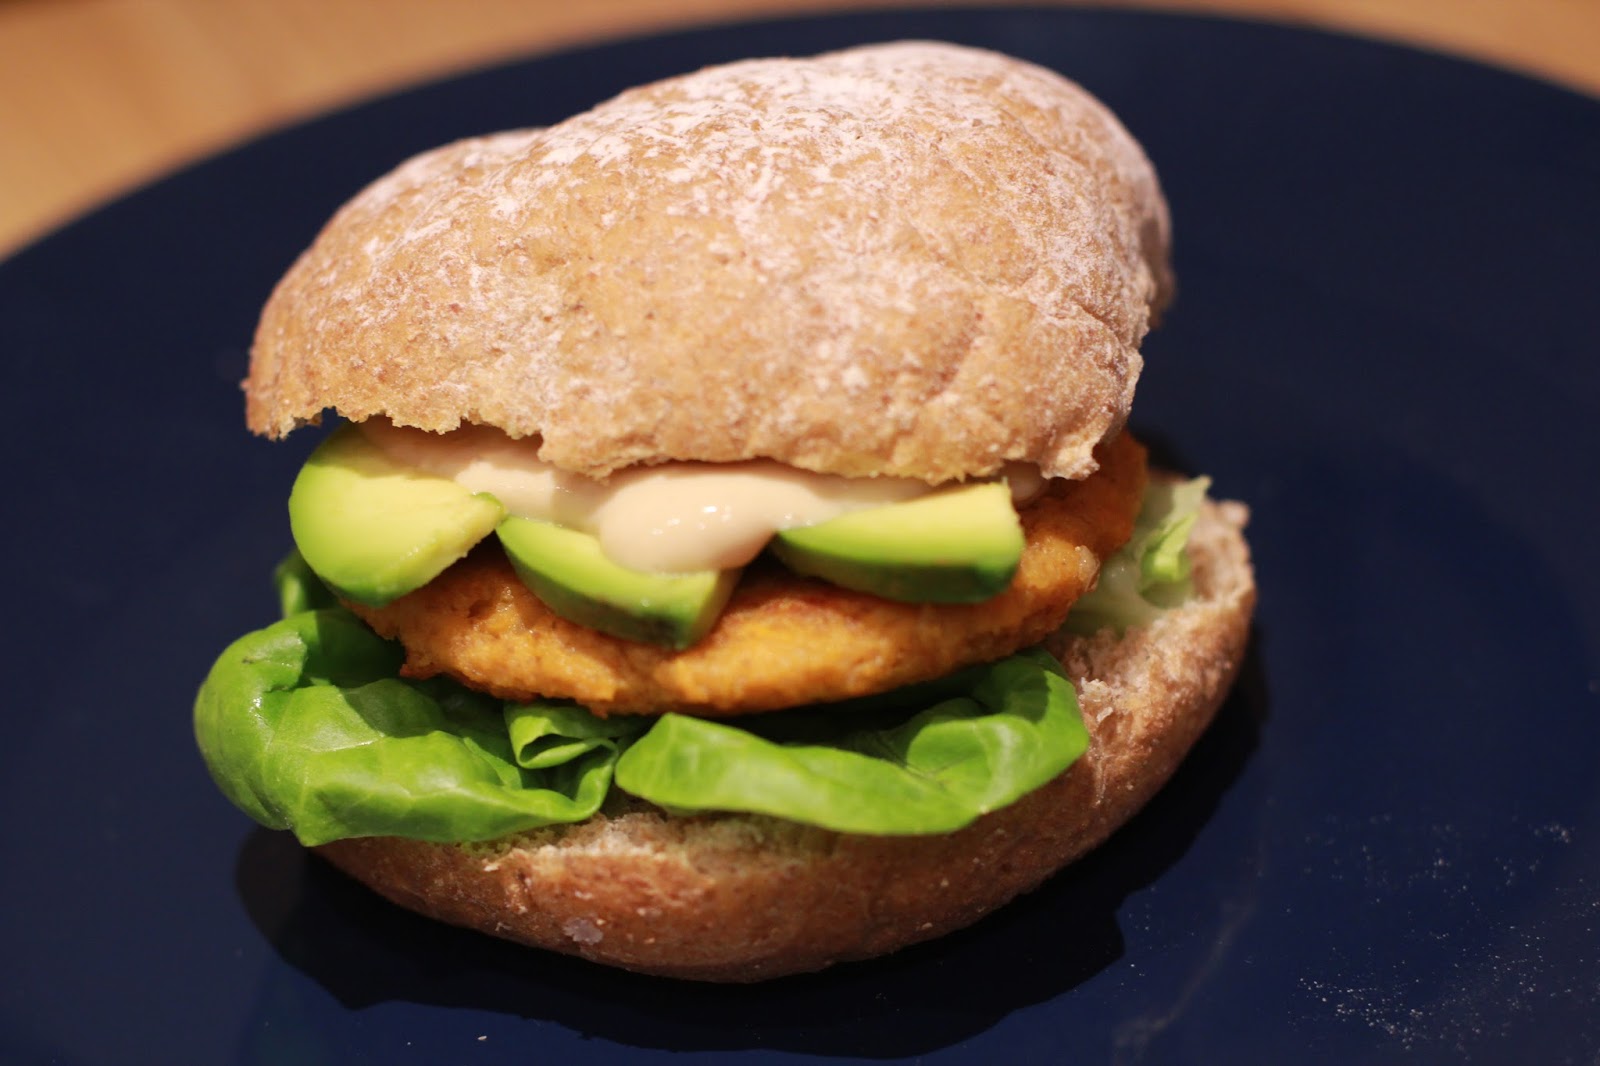
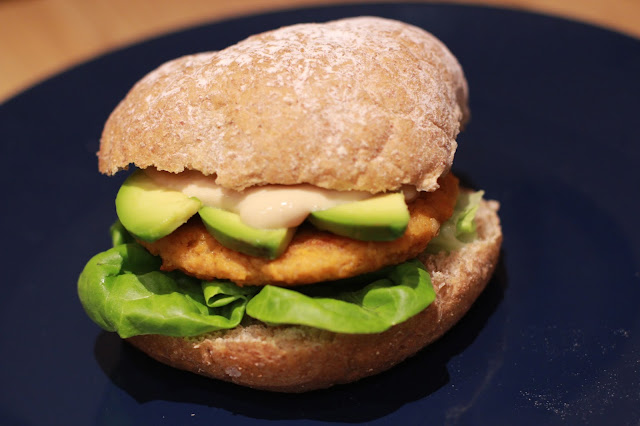
Smoky Sweet Potato Burgers with Roasted Garlic Sauce

In the past few months I've become a rather obsessed user of Pinterest. It is a fantastic tool for finding delicious vegan recipes that I would never have dreamed of. It's also a great tool for spying on my omnivore friends to see what kind of food they are eating so that I can make similar things and gently introduce them to a plant-based diet. Well, that's not entirely true, I do not do anything gently, but for whatever reason there are now many recipes on my Pinterest boards that aren't vegan but that I've pinned with the comment 'to be veganised'.

One of the other habits I've developed since becoming an avid user of Pinterest is that when I'm cooking with or for someone else I tend to just refer them to my 'Savoury Things to Try' board. That way the person I'm cooking with gets to maintain the illusion that they've been involved in the choosing of the menu but I get to cook something new I already wanted to try.

(I may be a little bit of a control freak.)

Last week The Hipster came across a vegetarian (but not vegan) recipe for sweet potato burgers with roasted garlic cream and avocado from How Sweet It Is during this aforementioned process. With a few substitutions and some tweaking of the process I easily turned the vegetarian recipe to a vegan recipe.

The burgers are delicious served on wholemeal buns with the roasted garlic sauce, sliced avocado and some fresh lettuce. A side salad with green or spring onions in it compliments the dish well and makes sure you get enough greens if you are eating this as a main meal.

I would suggest starting on the sauce first since you need to roast the garlic bulbs. But once they are in the oven you can start on the burgers and come back to the sauce later.

I've given instructions for both frying and baking the burgers. We fried ours but I've had just as much success baking burgers in the past if you want to avoid the oil. Also, frying the burgers will mean they are crunchy on the outside and rather moist and smooshy on the inside. If you prefer a more solid burger then I would suggest baking them.


Roasted Garlic Sauce

2 hands/bulbs of garlic
2 tsp olive oil
2/3 cup plain Greek soya yoghurt*
1 tsp maple syrup**
extra salt & pepper for seasoning

Preheat oven to 180C.

Slice the tops off the garlic bulbs so that the very tops of the garlic cloves are just exposed. This makes getting the garlic out easier later.

Gently rub the hands bulbs so that most of the loose paper comes away (so it's not so messy to deal with later) but leave at least one layer (to help keep the moisture in).

 Wrap each bulb in foil and place on a baking tray and drizzle 1 tsp of olive oil onto each bulb. Place in oven for 45 minutes. Then remove from oven, allow to cool slightly, remove foil and then allow to cool completely.

Once the garlic is cooled, squeeze each clove into a food processor or blender along with yoghurt and maple syrup. Blend until smooth. Add seasoning and then blend again for a few seconds.


* To make Greek soya yoghurt from your ordinary soya yoghurt, just strain through cheesecloth into a medium sized bowl (I use some leftover muslin from a top I made and hold it on to the bowl with some clean clothes pegs) for at least 8 hours (the longer you leave it, the thicker the yoghurt will be. If you put some on a teaspoon it should be thick enough to hold on for a few seconds when you slip it upside down). You can keep the whey (water that drips through) to make porridge or for baking as long as you keep in a clean, sealed container and use within a few days. Scrape the yoghurt from the cheesecloth and put into a sealable container (I normally wash the container the yoghurt originally came in and then just use that again) and use within a few days.

You could just use the soya yoghurt as it comes instead of making it into Greek soya yoghurt but your sauce will be a bit thinner. 

** If your yoghurt is sweetened you might want to leave this out.

Smoky Sweet Potato Burgers
makes 6-8

2 tsp ground flaxseed (or other egg replacer)
4 tbsp water
2 large gold sweet potatoes, peeled & chopped
400g can of cannellini beans, rinsed & drained
2/3 cup bread crumbs
1/2 cup flour
2 teaspoons smoked paprika
1 teaspoon onion powder
1 teaspoon salt
1/2 teaspoon pepper
1 teaspoon cumin
2-3 tablespoons olive oil (optional, for frying)

Whisk the flaxseed (or other egg replacer) with the water in a small bowl or mug until thick and creamy. Set aside.

In a medium sized saucepan, put the sweet potatoes in enough water to just cover them and bring to the boil then simmer until soft. Drain, rinse with cold water to cool them and drain again. (You could also cook the sweet potatoes in the microwave to speed things up.)

Meanwhile, in a large bowl, roughly mash the beans with a fork or potato ricer. You don't need to finely grind the beans, some chunks are OK.

Add the cooled sweet potatoes to the beans and mix. Add the flaxseed mixture and then the rest of the ingredients (except the olive oil). Put the mix in the fridge for 15 minutes (optional, although it helps with the stickiness).

Take out of the fridge and form into patties on an oven tray and some baking, greaseproof or parchment paper. This is easiest if you form balls in your hand (somewhere between a golf ball and a tennis ball) by rolling a handful gently in your palm and then gently pushing the patty onto the tray. You should have 6-8 patties. If you are frying your patties, refrigerate for another 15 minutes (optional, but helps keeps the patties together).

Frying: 
Heat oil in a frying pan over a medium heat. Scoop patties from baking tray with a flat spatula and place in pan. Fry on each side for 3-5 minutes.

Oven:
Preheat oven to 180C (this should already be happening because you should have roasted your garlic!). Bake the patties for 15-20 minutes or until burgers start to brown. If you want a tougher burger, leave in the oven for longer (but don't let it burn!).

Wednesday, May 9, 2012

Thai Green Curry

I used to love going to Chinatown on warm Brisbane evenings for a deliciously spicy Thai Green Curry, sitting in the lovely outdoor setting of Thai Wi Rat. When we moved to Cambridge we discovered local Thai restaurant Sala Thong but found that eating out in the UK is a little pricey. So we started making our own green curries at home but with bought curry paste. When we could find curry paste that didn't contain shrimp paste, it just didn't have the same limey, fresh flavour of the green curries in restaurants. So we started making our own curry paste and we've not looked back.

Below is a recipe for the curry paste and then a recipe for making the green curry. The only thing to be wary of is that Thai curries use a lot of coconut milk and can be quite fatty and thus unhealthy if eaten regularly. If fat content is an issue for you, try some light coconut milk instead. If this still isn't right for you, try adding more vegies and using a mix of half vegie stock, half light coconut milk.


Thai Green Curry Paste

6 medium green chillies, deseeded and roughly chopped
5cm/2in piece of fresh ginger, peeled and roughly chopped
2 garlic cloves, crushed
small bunch of fresh coriander
2 lemongrass stalks, chopped
juice of 1 lime
8 kaffir lime leaves, torn into pieces
1 tsp grated galangal
1 tbsp coriander seeds, crushed
1 tsp ground cumin
1 tsp black pepper (preferably from peppercorns)
2 tsp soy sauce
3 tbsp olive oil

Put all ingredients into a food processor or blend and blend until a smooth paste.

This recipe is enough for about 6-8 servings. You can use it straight away, store it in a fridge for up to 3 weeks or it even freezes OK.


Vegetable and Tofu Thai Green Curry

1/2 serving of above curry paste
1 tbsp vegetable oil (preferably sesame)
1 brown onion
1 cup green beans, chopped into 2.5cm pieces
1 carrot, sliced
1 bunch of Asian vegie (pak choi, bok choi etc), roughly chopped, leaves and ends separated
400ml coconut milk
300g firm tofu, cut into 1cm blocks
225g can bamboo shoots, drained
1 tbsp dark brown sugar (or palm sugar)
juice of 1 lime
coriander for garnish

Heat the oil in a hot wok and add onion and cook for a few minutes until it begins to soften. Add curry paste and stir for another minute. Add all of the vegies excluding the Asian vegie leaves and bamboo shoots. Add coconut milk and watch until it is about to boil.

Just before the coconut boils, lower the heat to a simmer. Add the sugar, bamboo shoots and tofu and let simmer until vegies are just about cooked. Then add lime juice.

Serve over rice (preferably jasmine although we prefer brown basmati).Garnish with coriander.

Serves 3-4.

Thursday, December 15, 2011

Vegetable and Lentil Stew with Herb Dumplings

We are off to Denmark next week to spend Christmas with a friend and his family. But before we leave I thought I'd post this yummy winter stew.

My picture does not do this dish the justice it deserves. It's a really delicious, filling dish that's great for cold winter nights. It's based on the recipe for Mushroom Stew with Herb Dumplings in vegan.

I hope you all have a great Christmas and and I'll see you all in the New Year!


Vegetable and Lentil Stew with Herb Dumplings

1 potato, chopped
25 g shiitake mushrooms, halved
125g oyster mushrooms, sliced
600ml (1 pint) vegetable stock
200ml of water
125g puy lentils (dried)*
1 red onion, chopped
1 carrot, chopped
125g frozen peas
1 red pepper/capsicum, deseeded and chopped
125g cabbage, chopped
2 heaped tsp cornflour
2 tsp vegan bouillon powder**
2 tsp cocoa
1 tablespoon of molasses***
1 tsp vegemite****
2 tbsp tomato sauce
125ml sherry

Dumplings:

1 3/4 cup self-raising flour
1 tsp vegan bouillon powder**
1 tsp chopped sage
1 tsp chopped thyme
1 tsp chopped parsley
3 tbsp oil
1/2 cup soya milk

Place the potato, shiitake mushrooms and lentils into large saucepan with stock and water. Bring to boil. Reduce heat and simmer for 20 minutes.

Mix all dumpling ingredients together in bowl. Make 12 balls (this is easier to do between 2 spoons or with 1 spoon and a hand. Two hands get rather sticky).

Add remaining vegetables to stew.

Mix the remaining stew ingredients into a small bowl. Then gradually add this to the stew. Stir constantly until stew thickens.

Sit dumplings on the stew and replace lid. Simmer for another 20 minutes until dumplings are cooked.


* We can never get dried puy lentils so use the canned ones. If you use the canned ones then don't put them in until the end just before you put the dumplings in. Alternatively, you can use red lentils or green lentils (the green ones will need pre-soaking, though, and may take longer to cook).
** If you can't get this, don't worry too much. We actually use this as the vegetable stock so just add a bit extra to make this. You could use dried vegie stock.
*** I use golden syrup instead of molasses. It's not really the same but it does the trick. 
****  Or whatever yeast extract you use.

Sunday, October 9, 2011

Soba and Kombu Dashi soup

Kombu dashi. I used dark soya sauce so my soup is quite dark. A light soya sauce will give a lighter soup.

I really love Japanese food. I especially love Japanese soups; they are low in fat but are warm and yummy on an autumn's afternoon.

We recently had a Japanese PhD student visiting our lab for a few months and she introduced us to a lot of Japanese food and cooking we would never have known about. And her father owns a chain of sushi restaurants in Japan so I think we can take it for granted that she knows what she is talking about!

I recently asked her for a recipe for some sort of soba noodle soup. She gave me the below recipe (to which I've added only minor comments). It involves something called kombu which is dried kelp to make the base soup. We found some in our local Asian grocer (although the packet is not necessarily going to be in English so you should ask someone). Besides from that the ingredients are pretty standard.

Kombu. An essential, pre-prepared ingredient for the soup base.

 Soba and Kombu Dashi soup

for the kombu dashi (advanced prep needed)
6 cups water
3 x 2 inch pieces of kombu

for the noodle soup
400g/14 oz. dried soba (buckwheat noodles)
1/3 cup soya sauce
2 tbsp mirin
1/2 tsp salt

for the topping
~300g block of tofu
2 tbsp sesame oil
1 leek, finely chopped
1 sheet nori, shredded

In advance:

The kombu dashi soup base can be made in 2 different ways: a quick way or a long (better) way. 

For both ways you take the kombu pieces and tear a couple of one inch tears on each end of the piece. This is to give the water somewhere newly exposed to seep in to. The piece should still be whole just with tears on each end (see picture).
Tear the ends of the kombu about 1 inch.

The long way to make the kombu dashi is to place the pieces in the 6 cups of water and soak for at least 4 hours (overnight is fine). The quicker way is to soak for 20 minutes and then slowly bring the soaking kombu to the boil. Before it starts bubbling, take it off the heat. After you've done either of these you need to strain the water to remove the pieces of kombu and anything else. To do this use a sieve and line it with 2 paper towels. Pour the liquid through the paper towels and sieve. You should collect some very clear, pure liquid at the other end. Discard the pieces and keep the clear liquid. The clear liquid is your kombu dashi.

To make the soup:

First fry the tofu. To do this you should pat your tofu block with paper towels to absorb as much liquid as possible. Then slice the tofu up into small chunks. Heat the sesame oil in a wok on high and fry the tofu for 2-3 minutes on each side. Once fried, place the tofu on clean paper towels to soak up some of the oil.

Cook your soba noodles according to the packet instructions (normally boil water, add soba, boil for 6-7 minutes, drain, rinse with cold water).

Heat the kombu dashi soup with the soya sauce, mirin, and salt in a large pot to make the soup. 
 Serve the soba noodles into four bowls. Pour the hot boiling soup over the noodles. Put the toppings on top of the noodles in each bowl.

Serves four.

Saturday, September 17, 2011

Get Stuffed!


Stuffed vegetables are awesome. Especially when you stuff the vegetables with more vegetables! The weather is getting colder so warm, yummy food with lots of vegatables (and vitamins), like the pictured dish, is more than welcome.

My general rule with stuffed vegetables goes a little something like: use whatever is in your fridge. I've posted about a stuffed field mushroom recipe before. However, zucchinis/courgettes stuffed with a delicious vegan pate is just as yummy. How do you make this delicious vegan pate? Well! I'm glad you asked.

Vegan Pate
adapted from vegan

1 cup red lentils
1/2 brown onion, chopped
1 clove of garlic, chopped
1 cup of vegetable stock
1/4 cup walnuts, chopped
1 tsp cider vinegar
1 tsp vegemite/marmite*
2 tbsp chopped dates
1 tbsp canola/rapeseed oil
1 tsp soya milk
1 tsp chopped thyme

Put lentils in a saucepan and cover with cold water (water should be about 2-3 inches above the lentils). Bring lentils to the boil then drain and rinse.

Return lentils to the saucepan with the onion, garlic and vegetable stock and bring to the boil. Lower heat and simmer for 20 minutes.

Drain the lentils again. Stir in remaining ingredients. 

Blend the lentil mix in the pot using a hand held stick blender or transfer the mix into a food processor/blender/liquidiser and blend until smooth.

Eat hot or cold.

If you want to stuff courgettes with the pate just cut about 1/4 of each courgette away along the length and scoop out the inside with a teaspoon. Brush with oil and bake for 15 minutes. Then add the pate and bake for another 10 minutes. If you are having trouble getting the courgette to sit flat then slice a sliver off the bottom edge, along the length.

The pate is also great on toast or crusty bread. I used it for a couple of days on sandwiches on fresh, grain bread with some vegan luncheon meat. It was very yummy!

* Or some sort of yeast extract paste.

Saturday, May 14, 2011

Comfort Food

Skillet Gardener's Pie
 I'm studying at the moment which is why I have been a little absent. Geoff has been doing all the cooking and I've been breaking my procrastination up between episodes of the L-word (which I'm about as fond of as Gossip Girl (which, if you did not already know, is a very very bad show) but that ain't stopping me from watching it), posting on Facebook about how angry I am about various things (voting referendum, human rights violations, Geoff breaking my Tupperware can opener etc etc) and pilates.

Right now I'm posting this as a break from climate change study. I smelled Geoff cooking in the kitchen and it reminded me of something I've been wanting to say on my blog for quite a while. It goes something like this: FatFree Vegan Kitchen's Skillet Gardener's Pie is one of the most delicious, comforting foods I've eaten for quite a while and it's super easy to make!

Now, I know it's very lazy of me to just steal someone else's recipe and post about it. Normally, I find a recipe and tweak it to my liking (and convert from those horrid imperial units to nice metric ones) but this recipe was so tasty as it was that there's not much point pretending to change it.

The only variation we did try was to use sweet potato on top instead of normal potato and it worked just as well. The sweet potato, however, is a little thinner so add the milk slowly as you may not need as much.

With sweet potato topping instead of potato.

While we are on the topic of comfort food (and FatFree Vegan Kitchen) I thought I'd also mention Susan V's Herbed Polenta with Beans and Bok Choi recipe. This was the first time I had ever cooked with polenta and was curiously surprised by the way it thickens up in the saucepan (I don't have a pressure cooker so couldn't cook it the way she suggests). It was quite easy to cook although all the stirring certainly gave me a work out. However, I was a little disappointed with its lack of flavour and how heavy it was in the dish. Most of the casual cooks I know love polenta but it just didn't float my boat. The vegetables in the dish too were a little bit of a disappointment (I used balsamic vinegar, since white vinegar seems impossible to get here, and I'm not sure if it was that that caused the unusual, biting taste the vegetables had or if the dish just wasn't to my taste).

Herbed Polenta with Beans and Bok Choi
I still like the idea of the dish, though, and I like that polenta is filling and easy to make so I might try to build on the recipe in the future. Any ideas or other similar recipe suggestion would be most welcomed!

Sunday, April 17, 2011

Beetroot Burgers

I mentioned a little while ago that my cousin had asked me to find the ultimate vegan burger recipe. I liked the Spicy Bean and Lentil Patties but thought I'd also try some other recipes. Of course my first point of reference was FatFree Vegan Kitchen and found the Roasted Beet-Tofu Burgers. However, I found the patties to be very sloppy and messy to eat. Although they look okay (see photo below) I thought the tofu in the patty made it far too soft and because you don't cook it separately it was a little bland.


After this attempt I decided to change things a little. I've been trying to move away from using too much tofu to using more beans. I've been buying lots of beans/chickpeas etc in dry form and soaking and cooking them myself. It is more effort but drastically reduces waste and energy use. The two ingredients you can prepare yourself to "save the world" I've listed under Advanced Preparation ingredients. However, I know not everyone has the time to be super green all of the time so there are alternative ingredients for the beets and chickpeas below the recipe and you won't need to do any of the advanced preparation steps.


 Beetroot Burgers

Advanced preparation ingredients:
3/4 cup dried chickpeas*
2 large fresh beets**
On the day of cooking ingredients:
1 tbsp ground flaxseed*** + 4 tbsp water
1 onion, chopped
3 cloves garlic, finely chopped
1 tbsp oil
1 cup fresh wholemeal breadcrumbs
1 tsp cumin, curry powder, hot chili powder
salt and pepper

Advanced preparation methods:

Soak the chickpeas overnight & cook according to packet. This will need to be done in advance.

Preheat oven to 180C. Trim the tops and roots off the beets but don't peel. Wrap each in foil and bake for an hour. Let the beets cool. Like the chickpeas this can be done in advance.

On the day of cooking methods: 

When you are ready to make the burgers peel the beets and chop roughly and set aside.

Heat the oil in a pan and fry the onion for a few minutes and then add the garlic and fry for another minute or so. Set aside to cool a little.

Put the cooked chickpeas and flaxseed + water in a food processor and blend until it looks a little like chunky bread crumbs. Add the onion, garlic and beetroot and blend a little more (if you aren't careful you'll end up with big chunks of beetroot like I did). Transfer to large bowl.

Add the breadcrumbs and spices and mix. You should have something that sticks together quite well but is squishy enough to be shaped easily in the palm.

Grab small handfuls to roll into small balls. Then you can cook them according to either method below.


Cooking Method 1:

Heat a frying pan to medium heat with some oil (spray or liquid). Place the ball into the pan and flatten very gently with a spatula. Cook about 5-8 minutes on each side watching that they don't burn. If your patty isn't flat enough you are better to let it cook on the first side and then flatten it further on the second side.


Cooking Method 2 (fat free):

Spoon balls onto a lined baking tray and flatten gently with palm. Cook for about 40-60 minutes. If you want you can check after 30 minutes and flip the burgers.

If you don't flip the burgers in the oven the downside will be
a little paler and less crispy but no less tasty.

* Alternatively, just use a 400g can of cooked chickpeas and ignore my chickpea cooking instructions.
** Alternatively, you can buy precooked beets in a tin or from the fresh food section of your supermarket. If you do this you'll need about 4 and you'll just need to roughly chop them and ignore the beet cooking instructions.
*** I'm sure some other egg replacer would work but I would recommend flaxseed for the Omega-3 and the creamy taste.


I'm not sure what is called beets where and what is called beetroots
elsewhere but you are basically looking for something that looks like this.

Wednesday, March 23, 2011

Vegetable Pilau

 If you just have some rice and vegetables and are looking for something easy but tasty for dinner then I can highly recommend this vegetable rice dish. I'm not 100% sure of the differences of pilau/pilaf/etc but I think pilau has its roots in the Middle East so that's where I've stuck it.


Vegetable Pilau

1 cup basmati rice
2 tbsp oil
1/2 tsp cumin seeds
2 bay leaves
4 green cardamom pods
4 cloves
1 onion, finely diced
1 carrot, finely diced
1/3 cup frozen peas, thawed
1/3 cup frozen or canned corn/sweetcorn, thawed if frozen
1/4 cup cashew nuts
2 cups water
1/4 tsp ground cumin
salt

Wash the basmati in cold water, cover with water and leave to soak for 30 mins. 

While rice is soaking get a non-stick frying pan and dry roast the cashews in the pan over a medium heat for a couple of minutes. Make sure you move the pan while roasting so that they don't burn. Turn out the nuts onto a plate to cool and return the pan to the stove.

Heat the oil in the pan and fry the cumin seeds for 2 minutes. Add the bay leaves, cardamoms and cloves and fry for 2 minutes. Add the onion and fry for 5 minutes until softened and lightly browned. Stir in the carrot and cook for 4 minutes. Drain the rice and add to the pan with the peas, corn and cashew nuts and fry for 5 minutes. Then add to this the 2 cups of water, ground cumin and salt. Bring to the boil, cover and simmer for 15 minutes over a low heat until all the water is absorbed. Take it off the heat and then let it stand for 10 minutes before serving.

Note: The cloves, cardamoms and bay leaves are quite strong for the unsuspecting diner so if you like their flavour in the dish but are not so crash hot on biting into them I strongly suggest taking them out as you are leaving the dish to stand. I certainly take them out!

Thursday, March 17, 2011

Spicy Bean and Lentil Loaf/Patties

One of my many cousins recently decided to give being vegetarian a try. She had tried previously but it didn't stick. This time I suggested the weekday vegetarian diet. She did and she's doing rather well at it! She even says that when she gets to the weekend she doesn't feel like eating meat.

Vegetarian cooking can be a bit daunting at first. The reason I love vegan cooking so much is because it requires so much imagination (unlike, say, Heston Blumenthal rolling four meats together, sticking them in hot water (sorry, water bathing them) and acting like he just invented cooking itself*). However, sometimes this need of creativity can be exhausting. My cousin, however, seems to have dived right in and had a bunch of questions for me... some of which I couldn't answer.

One of the questions she asked me was how to make vegan burger patties. Ummm. Good question.

I had tried making patties once before and they turned out absolutely horrid. This time it was a complete accident. I was veganising a lentil loaf recipe out of Vegetarian again when I realised I couldn't fit all the ingredients in the food processor. So I split my batch up, put the first batch in the loaf pan, realised it was full, stuck it in the oven and pondered what to do with the rest of the ingredients. Then I remembered my cousin's request for a burger recipe.

Well, they turned out just great as both a loaf and a patty.


Spicy Bean and Lentil Loaf/Patties

2 tsp olive oil
1 onion, finely chopped
1 garlic, crushed
2 celery sticks, finely chopped
400g can kidney beans, drained
400g can green/brown lentils, drained
2 heaped teaspoons of ground flaxseed** + 4 tbsp water
1 carrot, grated
1/2 cup vegan cheese, grated***
1 cup breadcrumbs
2 tbsp tomato sauce/ketchup
2 tsp ground cumin
2 tsp ground coriander
2 tsp hot chilli powder
salt and pepper

Heat the oil in a pan and cook the onion, garlic and celery for 5 mins on low-medium heat. Remove from heat and let cool. 

Whisk the flaxseed and water together until it is creamy. Put the flaxseed mixture, onion mixture and bean and lentils in a food processor/blender and blend until smooth. Transfer to a mixing bowl and add the remaining ingredients.

The lentil loaf tastes great cold with salad or hot with vegies.
To make lentil loaf:
Preheat the oven to 180C, lightly grease a loaf tin, put mix in loaf tin and baked for 1 hour. My mix needed a bit longer but make sure you check it often if you leave it for over an hour.


Cooking the first side quickly then flipping ensures you can squash your patty down without it falling apart or getting stuck to the spatula.
 To make patties:

Heat some oil in a pan on medium heat. Spoon out a ball of mixture (it ball should be big enough to just put your hand around), roll it gently in your hands and place it in the pan. Leave it for a minute then flip the ball (this ensures you have one side that's cooked enough to be prodded without sticking). Flatten with a spatula making sure the spatula is clean so the mix doesn't stick to it. Turn the heat down to low. This is important because you want the heat to cook through the patty, which takes a while, without burning the outside. Leave for about 5 minutes and then flip again. Leave for another few minutes. Repeat for the other patties (you can cook more than on at once just make sure you turn the heat up before each batch so the first side cooks a little quicker than the second side).

Serve with some salad, hummus and chilli sauce on a bun.
* Okay, calling Heston Blumenthal unimaginative is a bit of a stretch but I'd respect his creativity a lot more if he challenged himself and didn't rely so heavily on meat.
** You can use egg replacer if you want but remember that flaxseed is full of omega 3!
*** I swear there is nothing that tastes as bad as vegan cheese but inside the loaf you can't taste it. If you don't have any lying around just leave it out.

Friday, March 11, 2011

Leek, Mushroom and Lemon Risotto

This recipe is a veganised version of a recipe I found in the wonderfully colourful Vegetarian. The lemon adds quite a nice flavour and considering that it is not a difficult recipe to prepare and that leeks have the nifty attribute of being in season in the UK from September to March I think this is a great recipe for cold winter nights. We shared this one over a bottle of wine with some friends.

If you want to try to keep to seasonal ingredients ignore the lemon rind and just use bottled lemon juice.


Leek, Mushroom and Lemon Risotto

225g trimmed leeks (about 3)
225g brown-cap mushrooms
2 tbsp olive oil
3 garlic cloves, crushed
salt and pepper
6 tbsp vegan butter
1 brown onion
1 3/4 cup aborio rice
5 cups vegie stock
3 tbsp lemon juice
lemon rind, grated
2/3 cup vegan parmesen
2 tbsp fresh chives, chopped
2 tbsp fresh parsley, chopped

Wash the leeks and slice them in half lengthways then chop roughly. Chop the mushrooms roughly too. Heat oil in a saucepan and cook the garlic for 1 minute and then add the leeks, mushrooms and lots of salt and pepper. Cook over medium heat for 10 minutes until soft and browned. Remove from pan and set aside.

Add 2 tbsp of the butter to the just emptied pan and cook the onion for 5 minutes. Stir in the rice and cook for 1 minute until golden. Add a ladleful of stock and cook gently, stirring now and then. Once the liquid is absorbed add another ladleful until it is absorbed. Repeat this process until the risotto is thick and creamy and the rice is tender but not sticky.

Just before serving add the leeks and mushrooms with the rest of the butter, grated rind and 3 tbsp of the lemon juice. Adjust the seasoning and serve.

Sunday, March 6, 2011

Red Pesto

I decided to try out a roasted pepper pesto recipe from The Perfect Pantry but I pretty much suck at sticking to recipes and came up with my own. The real reason for this was that the roasted peppers (capsicum) that I bought were soaked in brine and I thought brine was salty water but apparently their definition of brine is vinegar. So my pesto tasted a lot like vinegar. The recipe also called for more vinegar and I added this except I didn't really look at the bottle it was coming from and so it turned out I added sesame oil and not balsamic vinegar.

Yes, I suck at sticking to recipes.

I would not recommend adding the sesame oil.


Red Pesto

1/2 cup pine nuts, toasted in oil free pan for few minutes
12 oz/340 g roasted red peppers/capsicum (from jar, weight after drained)
1/2 cup firmly packed fresh parsley leaves
2 Tbsp olive oil
1/2 cup olives (pitted)
1/2 cup sundried tomatoes
1 Tbsp balsamic vinegar (leave this out if peppers are in brine)
1 pinch of mild red pepper flakes
2 cloves garlic
salt and pepper to taste
Put ingredients in food processor and blend until smooth. If pesto is a little sticky or looks like dough add another tbsp of oil.

Makes enough pesto for 500 grams of dried pasta.

Wednesday, March 2, 2011

Gado Gado

My father has owned his own business and has worked long hours for most of my life so I don't have many childhood memories of Dad being involved in my schooling. The one memory I do have is from when I was about nine and our school had an Indonesian day (since Indonesia is one of our closest neighbours we learned Indonesian in school). Dad took time off work and came to the school for the celebration and I remember sitting on the little tiny playground benches eating peanut satay chicken kebabs on banana leaves proudly eating with my Dad. Ever since that day I've loved peanut sauces (although I gave up on the chicken a while ago).

(Mum drove us everywhere and came to every other school event but I only remember Dad's solo visit. Poor Mum.)

Gado Gado is a traditional Indonesian dish of vegetables served with a peanut sauce. The only downside to peanut sauces are that they are quite high in fat but they are goddamn tasty so I'm happy to treat myself now and then. And considering the amount of vegetables you eat with this dish it's not too bad of a balance.

The things that makes this dish is the sauce so as long as you have that you can change the vegetables to whatever you have in the cupboard. However, I've included a recipe for a vegetable mixture because I loved the crunchy texture of it.

The only odd ingredient in this mix is the galangal. I've not seen it in the UK or in Australia fresh but we found a jar of galangal at Tesco and I just use that. It's popped up in a few recipes so it's handy to have. I imagine it would be easy to come across in Chinatown in Australia or maybe even just the supermarket.


Gado Gado

250g white cabbage, shredded
4 carrots, matchsticked
4 celery sticks, matchsticked
4 cups/250g beansprouts
1/2 cucumber, matchsticked
3 tbsp peanut oil
1/2 brown onion, cut into rings
salted peanuts, to garnish
chilli, sliced to garnish

Peanut Sauce
1 tbsp peanut oil
1/2 brown onion, finely chopped
1 garlic clove, crushed
1 tbsp minced galangal
1/4 tsp ground chilli powder
1 tsp ground cumin
1 tsp lime juice
4 tbsp crunchy peanut butter
1 tsp soft light brown sugar

To cook the vegetables heat the oil in a pan and fry the onion rings and set aside on a paper towel to cool. Steam the cabbage, carrot and celery for 3-4 minutes (you want them tender but still with some crunch). Spread beansprouts on a plate and place steamed vegies and cucumber on top.

To make the sauce heat the oil in a saucepan and add onion and garlic. Cook for 5 minutes until soft. Stir in spices (including galangal) and cook for 1 min further. Add lime juice, peanut butter and sugar and mix well. Heat sauce gently, stirring occasionally and adding a little hot water if necessary to make the sauce runny enough to be poured but still thick.

Spoon some of the sauce over the vegetables, toss lightly and garnish with fried onion, peanuts and chilli with the extra sauce on the side.


Tuesday, February 15, 2011

Rice and Beans with Avocado Salsa

This is, without a doubt, my new favourite recipe. We've been having it at least once a week since we discovered how awesome it is. It's from Vegan Cooking (Eating for Health) and is so very delicious. And don't decide to skip the salsa as it makes the dish!


Rice and Beans with Avocado Salsa

Rice & Beans
1/2 cup canned kidney beans, rinsed and drained
4 tomatoes, halved (seeded, if you are patient)
2 garlic cloves, chopped
1 brown onion, sliced
3 tbsp olive oil
1 cup long grain brown rice, rinsed
2 1/2 cups vegetable stock
2 carrots, diced
1/4 cup green beans, chopped into thirds
salt & pepper
4 tortillas to serve

Salsa 
1 avocado
juice of 1 lime
1 small red onion
1 small red chilli, seeded and chopped
1 tbsp chopped fresh coriander

Preheat grill to high. Put onion, tomatoes and garlic in a baking tray and cover with 1 tbsp of the oil. Toss to coat and grill for 5 minutes on each side. Set aside to cool. Once they are cooled puree in a blender.

Heat the rest of the oil (2 tbsp) in a saucepan and add the rice and cook for a few minutes until golden. Add the puree and cook for 2 minutes.Pour in the stock and cover, cooking for 20 minutes. Stir occassionally.

Take out 2 tbsp of the kidney beans for the salsa and add the rest to the rice with the carrots and green beans and cook for a further 15 minutes until vegetables and rice are softened. Season.

The rice simmers down in its juices and tastes delicious!

To make the salsa dice the avocado and toss in lime juice. Add the onion, chilli, coriander and kidney beans and season with salt.

This avocado salsa is so yummy you could eat it on its own!
Spoon the hot rice onto tortillas. The salsa can be served separately but I like to put it on top of the rice and roll my tortilla up. Delicious!


Monday, January 31, 2011

Fat Free Vegan Kitchen

So as part of my new year resolution to eat healthy on week days I've been basically making every meal from Susan V's fantastic blog Fat Free Vegan Kitchen. I've mentioned this blog a few times before but some of the recipes I've tried making recently were so fantastic that I thought I'd share my pictures and some comments. I'll link to each of the recipes but make sure you check out her whole recipe collection. She has this fantastic feature where you can pick out your favourite recipes or recipes you really want to try and put them into your "Recipe Box". At first I was a little surprised that a fat free blog won the VegNews Favourite Blog award for three years running but once I started cooking from her blog frequently I found out why!

Brussels Sprouts and Shiitake Mushroom Soup: This is by far my favourite recipe. So yummy on cold nights and such wonderful flavours. The brown rice takes a while to cook but it's a very easy recipe to make.
Spinach and Artichoke Pie: So Geoff couldn't get filo pastry and so bought shortcrust pastry instead. Not exactly fat free so I just ate the filling but it so so delicious that I scooped out inside of the left-over pie and hid it in the fridge so I could have it for lunch the next day too.
Chocolate-Orange Cake: I baked this cake for a friend in the lab for his birthday. I actually found it to be a little too dense for my liking but for a fat free cake it's brilliant and everyone in the office loved it. My supervisor liked it so much his wife asked me for the link.

Pasta with Asparagus, Cannellini Beans, and Porcini Cream: I was so excited about the flavour of the porcini cream for this recipe but when I put everything together it tasted a little floury. I also think I undercooked the asparagus.
Chickpea and Turnip Stew with Ethiopian Spices: I don't have a photo of my dish but this is me making up the spice mix. I didn't really like the flavour of this dish. I think I put too many cloves or something in it.
Orange Couscous Curry: This was tasty and very easy to make. We bought the mandarin pieces in a jar but I'm sure you could use fresh ones if you are lucky enough to be currently living in a country where fresh fruit doesn't taste like potato.

Tuesday, November 30, 2010

Oriental Ratatouille

Once again adapted from Virtually Vegetarian this is quick and easy and delicious.


Oriental Ratatouille

1 tbsp sesame oil
4 tbsp olive oil
1 clove garlic, crushed
1/2 inch ginger root, finely chopped
1/2 red pepper, diced
1/2 yellow pepper, diced
1 zucchini, diced
50g mooli*, diced
1 small aubergine, diced (small)
200g plum/egg tomatoes, diced
400g can chopped/whole tomatoes
1/2 tsp sugar
salt & pepper
10 basil leaves

Heat oils in a pan and simmer garlic and ginger until they release their aromas. Add all the vegetables excluding the tomatoes and saute on a high heat for 2-3 minutes. Then add the tomatoes and sugar and cook for another half a minute. The vegetables should not be brown and should be crispy. Season to taste and add basil. Transfer to another dish to let it cool.**


* See previous post about this.
** This will stop it from continuing cooking in the pan and being overcooked.

Oriental Black Risotto with Basmati Rice

This is by far my new favourite dish. It's a bit involved but well worth it. Very delicious! This is adapted from Virtually Vegetarian.


Oriental Black Risotto with Basmati Rice

Risotto

50g vegan butter
1 small onion or shallot, finely chopped
1 clove garlic, finely chopped
1/2 inch piece ginger root, finely chopped
250g basmati rice
2 tsp Chinese five-spice powder
3 cups mushroom stock*
salt & pepper
2 tbsp dark soy sauce

Vegetable Garnish

4 tbsp sesame oil
50g vegan butter
14 shiitake mushrooms, halved
1/2 inch ginger root, finely chopped
1 carrot, grated
1/4 red pepper, thinly sliced
1/4 green pepper, thinly sliced
15g mooli (daikon raddish), grated*
2 spring onions, finely chopped
16 coriander leaves

Risotto

Heat butter in a saucepan and add onion/shallot, garlic, ginger and cook for 1 min. Do not brown. The add rice and try to coat the grains with the melted butter. Then add five-spice. Pour in the stock and bring to the boil, stirring occasionally. Season to taste and simmer for 15-20 minutes stirring frequently. Rice should be al dente and most of the stock should evaporate. 

Once you have cooked the risotto, add the soy sauce.

Vegetable Garnish

While the rice is cooking heat 1 tbsp of the sesame oil and 15g of the butter in a wok or frying pan. Saute the mushrooms until tender. Remove the mushrooms, place on a plate with a paper towel over them and keep them somewhere warm.
Heat the rest of the oil and butter in the same pan and stir in ginger and garlic. Leave for a few minutes then add the rest of the vegetables. You want the vegetables to be crisp so don't overcook. Season.

Spoon the risotto into bowls and garnish with the vegetables, mushrooms and coriander leaves.

* I made my own and will post the recipe soon.
** I'd never seen it before I came to England so I don't think you'll be able to get it in Australia. It doesn't add much to the dish anyway and could easily be left out.